

Introduction
One of the limitations of ChatGPT, which may not come as a surprise, is that it does not possess absolute knowledge. It’s trained on limited amounts of information (which is still more than half a terabyte…) that was available at the time it was trained. That is often why ChatGPT may attempt to confidently make up information (e.g. hallucinate) because it’s simply optimized to serve your question regardless of whether it has the information or not.
This is not ideal if you’re going to deploy ChatGPT as a chatbot, especially if it must handle questions that can only be answered using a knowledge base of sources that were unavailable at the time of training of ChatGPT. This can be due to many different reasons:
- The sources are confidential, private or live behind a login wall
- The source are novel, unpublished, not yet accessible
- The sources live on-prem or offline, not accessible through the internet
The bottom line is that you have a knowledge base and we want to augment ChatGPT such that it can leverage this knowledge base to answer questions.
We do not really care whether this knowledge base contains research papers, internal company documents, news pages, reports or a 100 page essays about the illuminati. We do care however – for the sake of creating a chatbot in this tutorial – where this information is stored and in what form (pdf, word, excel, …).
Tutorial
Why Azure Machine Learning?
There are dozen different tools out there with the golden promise of helping you build a vectorDB and thus manage embeddings. It can be frustrating to understand how they differ from each other and which one you should pick. In this blog, we are going to easily overcome this battle by working with Azure Machine Learning. There are many motivations behind this approach. That is, the seamless integration of Azure OpenAI with Azure Machine Learning and other underlying Azure services (storage, compute, …) needed to operationalize our chatbot. Moreover, Azure Machine Learning can handle and automate the low-level operations of the vector database (setup, indexing, chunking, scaling) so that we can focus on the use-case.
The (toy) problem
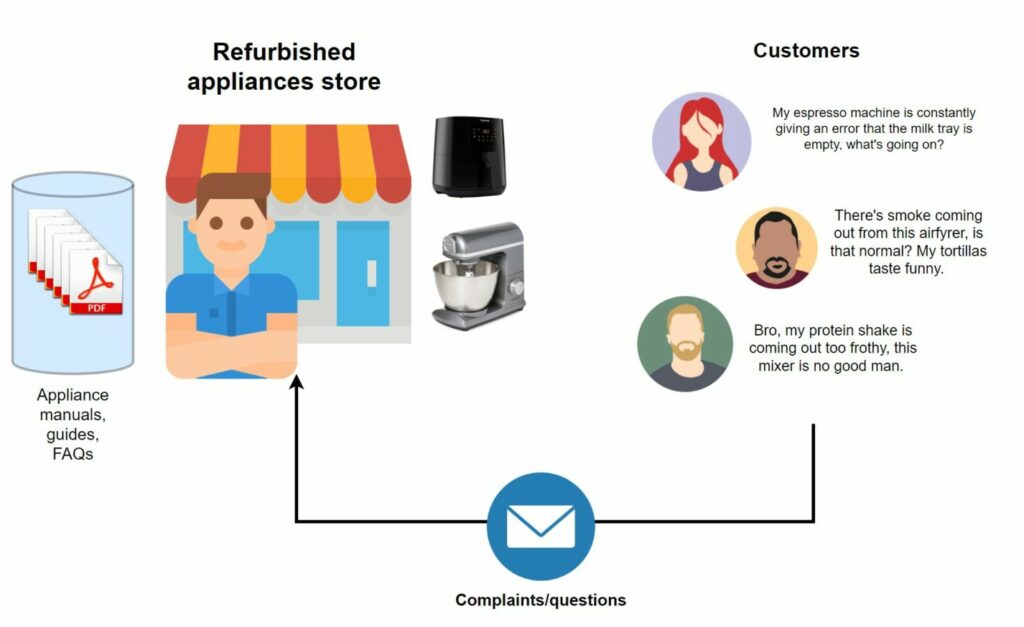
Imagine we’re running an appliance store where we sell refurbished appliances. Now when we sell these appliances, they usually don’t come with manuals because the initial owner would have lost or thrown these away. Luckily, the brilliant store owner that I am, I download a digital version of it and keep it in my file storage in case I get questions or complaints from customers. My customers love the fact that they can email me any questions and get an actionable response usually within the same business day. Of course, as I get more customers, it’s hard to keep up with these questions. Besides, I don’t like having to look through documentation. It takes a lot of time and I would rather spend this time doing meaningful work, like running the store and fixing broken appliances.
In conclusion: I would much rather have a large language model (LLM) such as ChatGPT answer these questions using my knowledge base as a reference.
High-level overview of the setup
There will be two stages to building a chatbot solution in Azure Machine Learning.
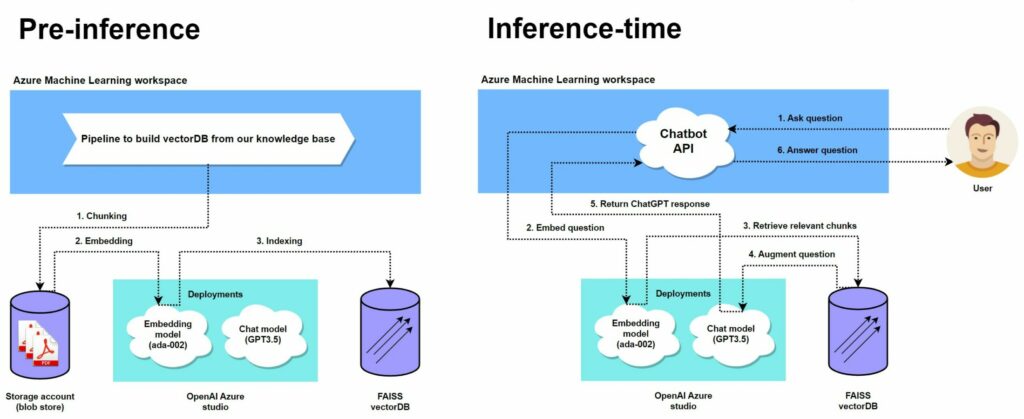
Pre-inference
In the first stage, we will transform our knowledge base of PDFs (manuals, FAQq, …) to a vector database. There are a couple vector database tools to choose from in Azure Machine Learning. In this tutorial, we opt for FAISS (Facebook AI Similarity Search) which is already integrated in Azure Machine Learning. This is a tool developed by Meta and optimized for efficient similarity search with dense vectors. In summary, what Azure Machine Learning will do for us is provide a pipeline to:
- Split all sources (PDFs in our example) into meaningful chunks.
- Embed all chunks into vectors using an embedding model
- Store all embeddings in a vectorDB (FAISS) and generate an index for each embedding
With the click of a button, Azure Machine Learning will handle all low-level operations of chunking, embedding and indexing of embeddings. This is one of the benefits mentioned earlier. You can read more on how FAISS works under the hood here.
Inference-time
Once we have a vectorDB built using the embeddings, we can start doing inference. Essentially, we will augment all incoming questions (that would initially be answered by ChatGPT) with additional documents (context) from the vectorDB. This will help ChatGPT with answering the question using our knowledge base.
To do so, we will first embed the question, and use the vectorDB to retrieve relevant chunks of information. The relevancy is usually based on “similarity” which in turn is defined using a proximity function (Euclidean distance). So all we’re doing is calculating which vectors are most similar (“closest”) to our question vector and add the associated tokens (text) to our initial question. We then let ChatGPT produce an answer based on the augmented question. Even though we are limited to what FAISS offers, there are many different ways to calculate “similarity” (cosine, Euclidean, …) and to select vectors (maximize similarity, variety, …).
Of course, there are edge cases. For example, what happens if there are no relevant chunks or what if the token limit is exceeded? In that case, we can program workarounds to let ChatGPT generate default responses or in the latter case, pick only the top 5 relevant documents. We won’t focus too much on these edge cases for the sake of keeping this tutorial short.
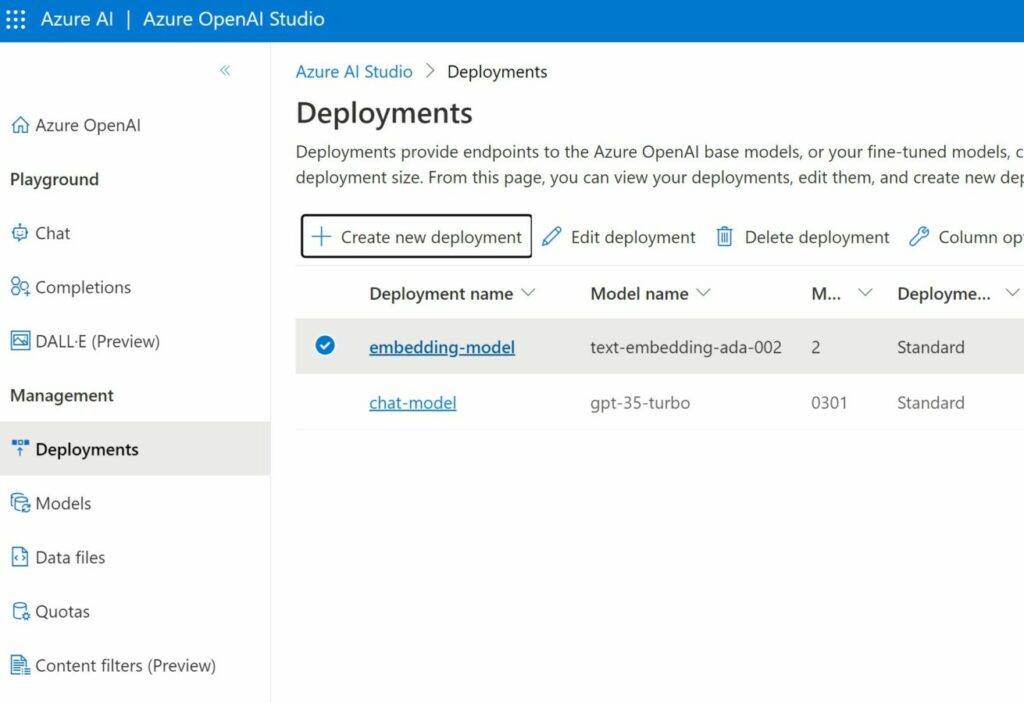
Setup Azure OpenAI
We need two types of models to realize our chatbot solution. A text embedding model and a chat model. In the portal Azure, go ahead and create an Azure OpenAI service. When created, go to Deployment and deploy two models, namely the text embedding model and chat model. We will need these models later.
Setup Blob store
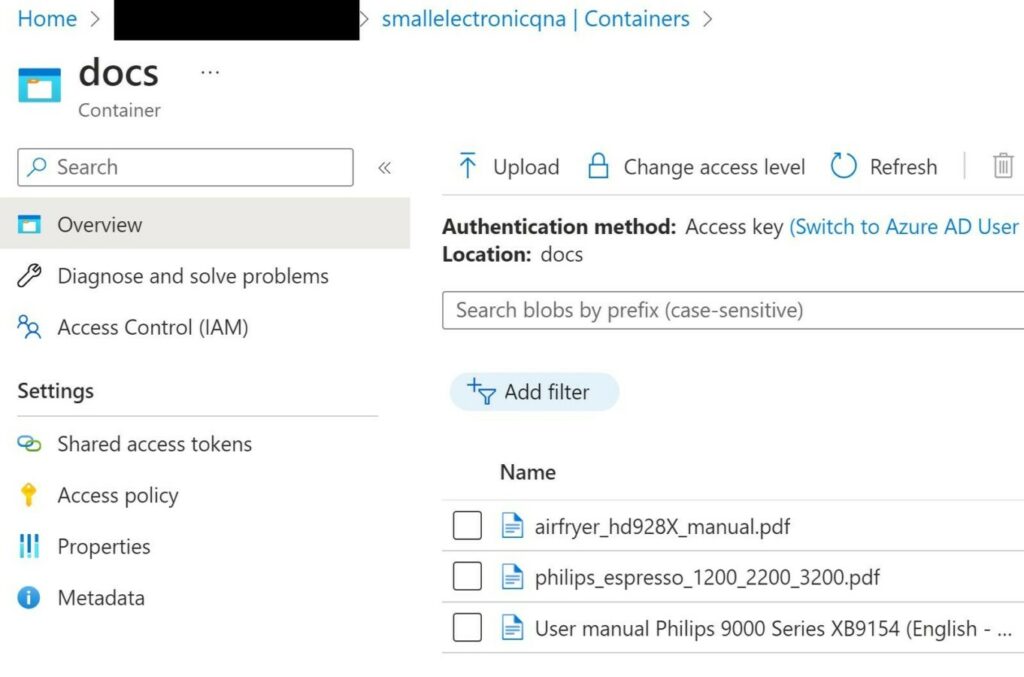
To store our appliance manuals, we need to set up a blob store. You can do this by creating a storage account via the Azure Marketplace. In this example, I’ve created a storageaccount named “smallelectronicqna”.
I’ve picked a few random appliance manuals from the internet and uploaded them under a container (named “docs”). Please ensure to only upload file any of the following extensions: .txt, .md, .html, .htm, .py, .pdf, .ppt, .pptx, .doc, .docx, .xls, .xlsx.
The reason for this is that Azure Machine Learning (currently) only supports these file types to build a vectorDB.
Setup Azure Machine Learning
Go to the Azure Marketplace and create a Azure Machine Learning (AML) workspace. You can go through the documentation if you’re not very familiar with the AML studio.
Azure OpenAI integration
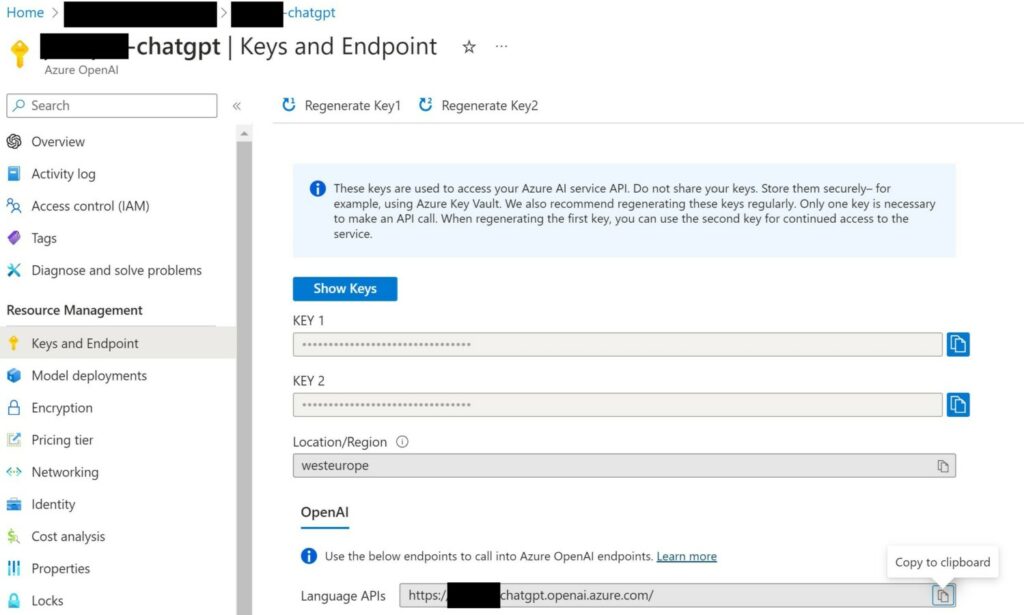
Once the AML studio is created, we must link our Azure OpenAI instance to the studio. To do so, open the Azure OpenAI overview page and under “Keys and Endpoint”, copy the KEY 1 (or 2) and copy the entire base URL (often in the form https://<instancename>.openai.azure.com/).
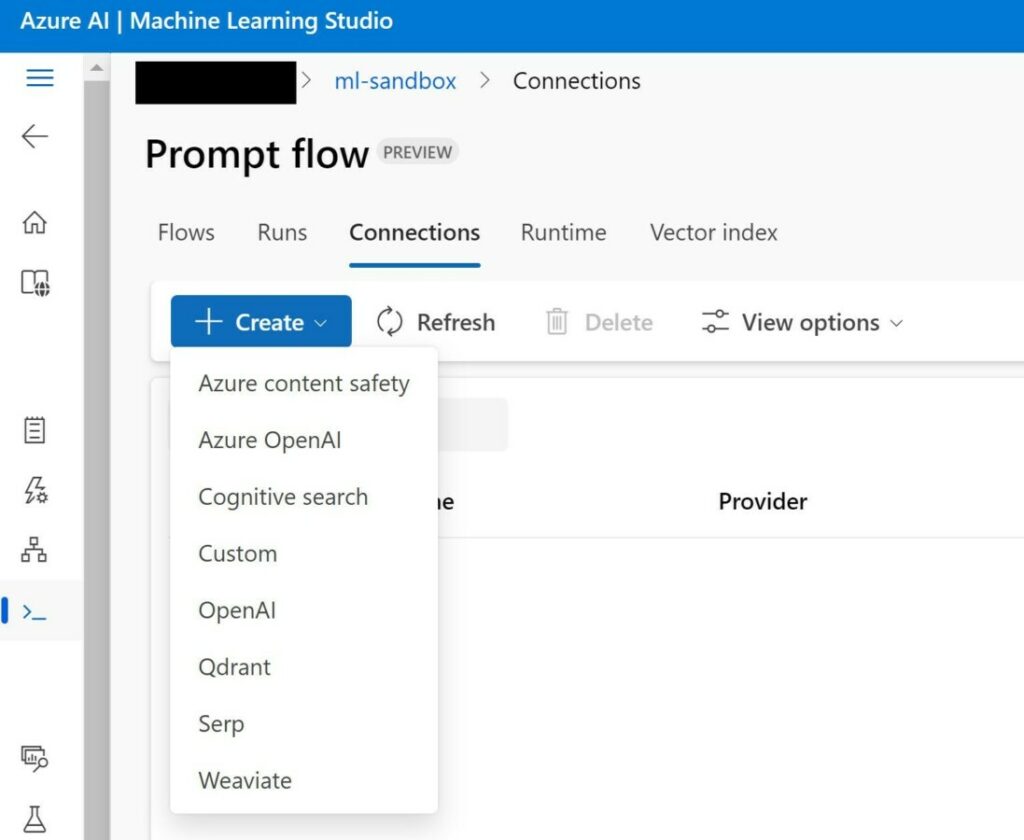
In AML studio, create a new “Azure OpenAI” connection.
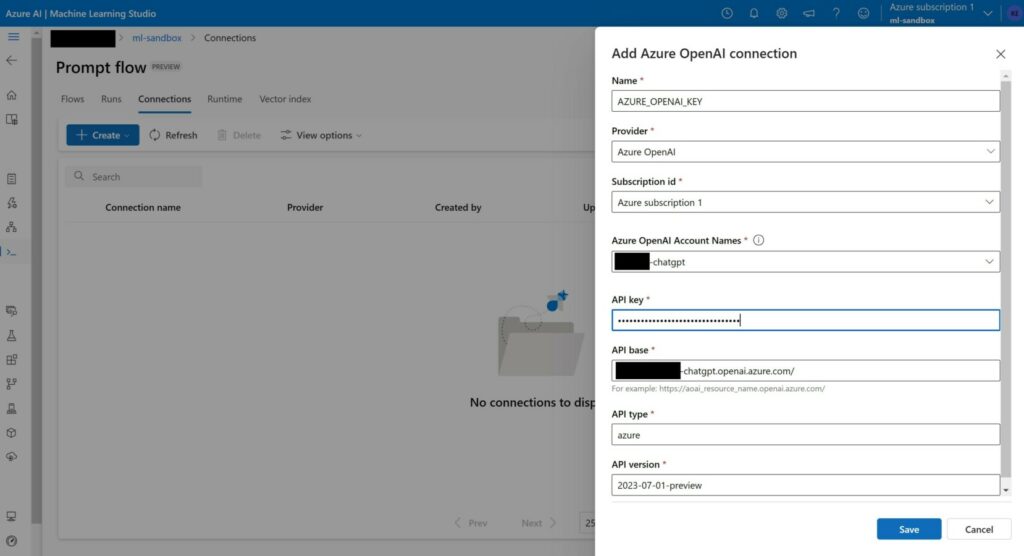
Choose a name, pick the right provider and fill in the KEY and base URL copied earlier. Save the connection.
Data store integration
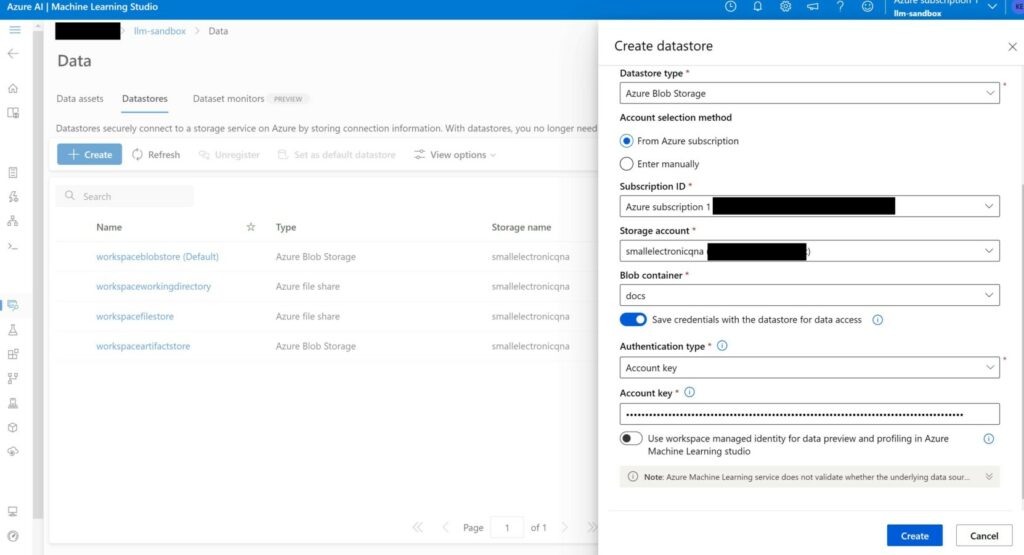
Now we need to link the blob store that we created earlier. To do so, go to “Datastores”, and create a new datastore. Choose the right storage account (“smallelectronicqna” in my example) and pick the correct container that the sources are in (“docs”). To get the account key, go to the overview page of the storage account, and under “Access Keys”, copy the first key. Create the datastore.
Data asset creation
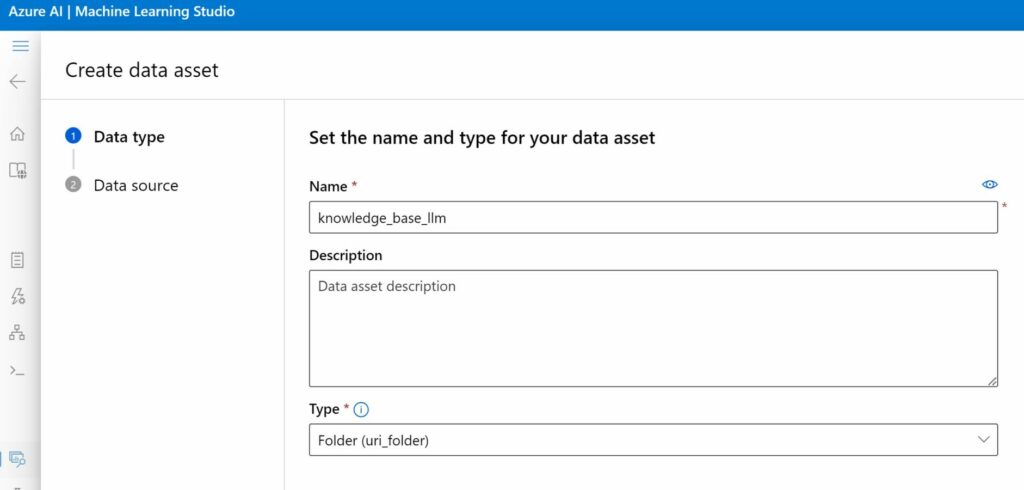
After creating the datastore, you must create a data asset (go to “Data assets” under the same page). Pick an appropriate name and choose “Folder” as type.
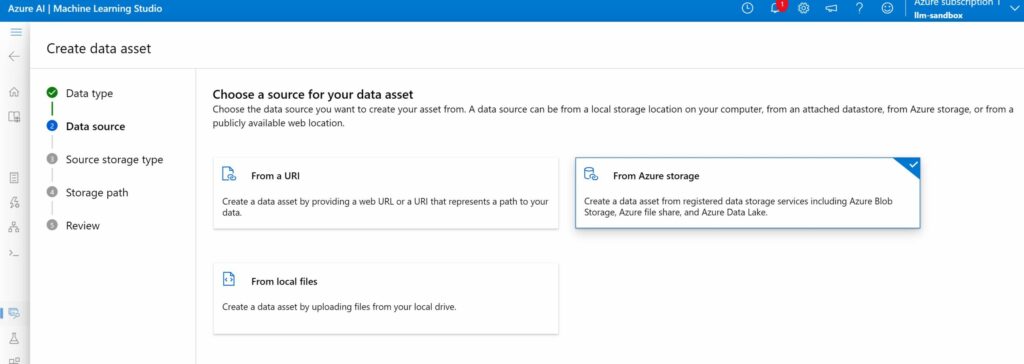
As a source, pick “Azure storage”.
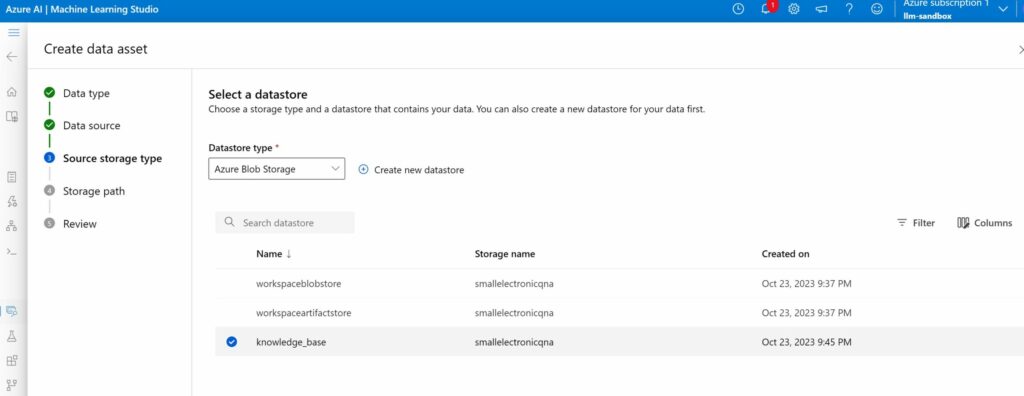
Select the data store that we created earlier.
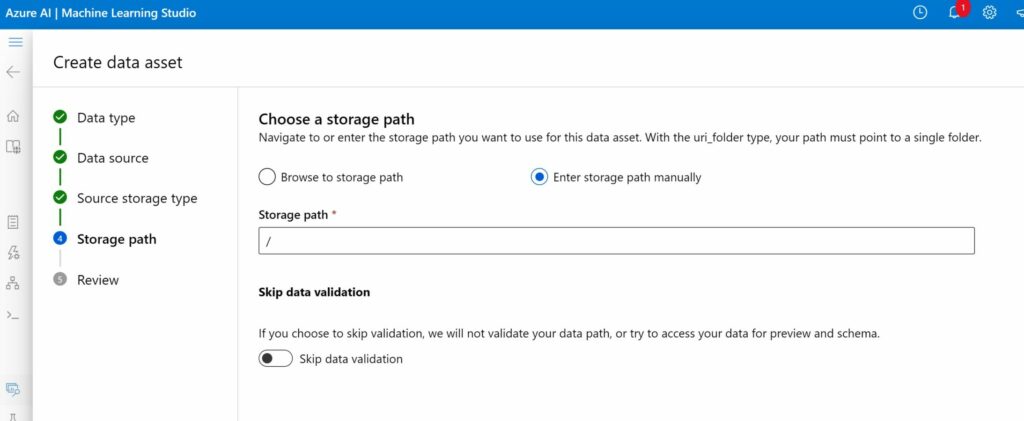
We pick the root folder of the container as the storage path (/). This is the folder where all PDFs are (and will be) uploaded.
Create vectorDB
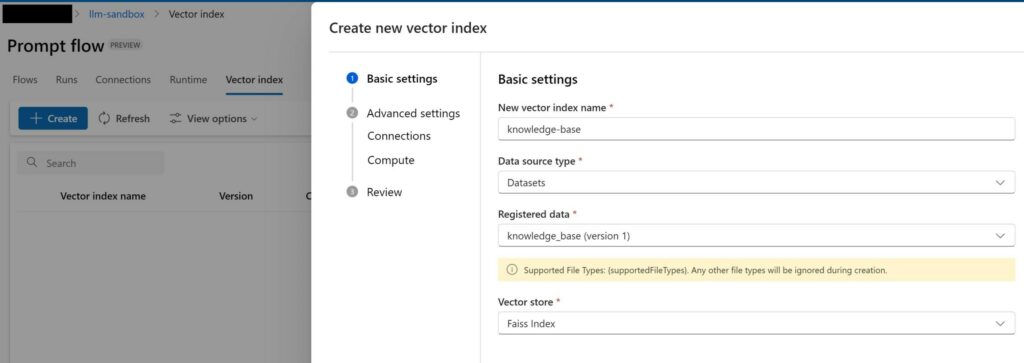
Now the knowledge base is registered as a data asset, it’s time to build our vectorDB. This can be done by creating a job that will go through all low-level steps to convert our data asset to a vector store. Go to “Vector index” under the Prompt flow page. Create a new Vector index. Pick an appropriate name and and select FAISS, as the vector store.
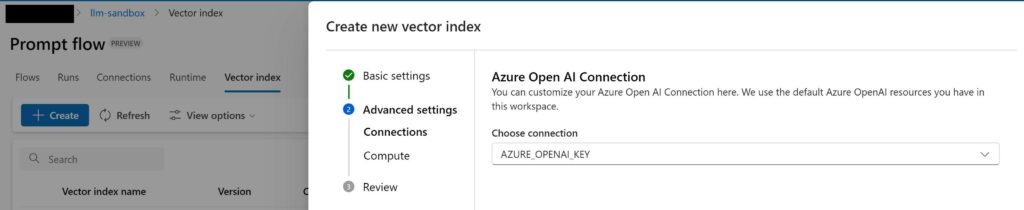
Select the Azure OpenAI connection that we created earlier.
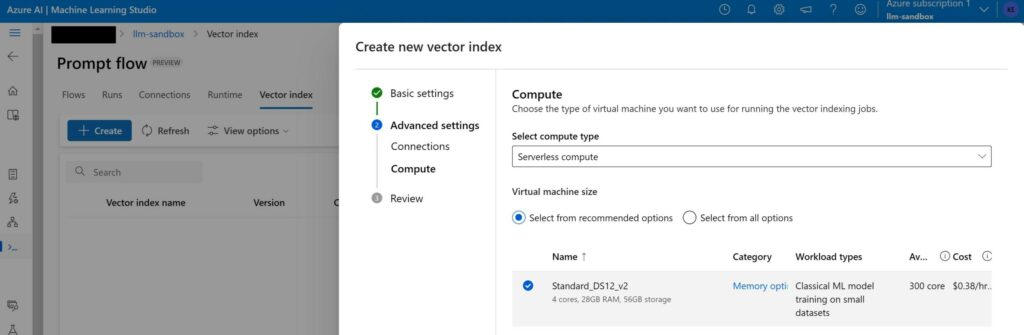
You can create a compute instance under “Runtime” to run this job or just select a serverless compute. We opt for the latter.
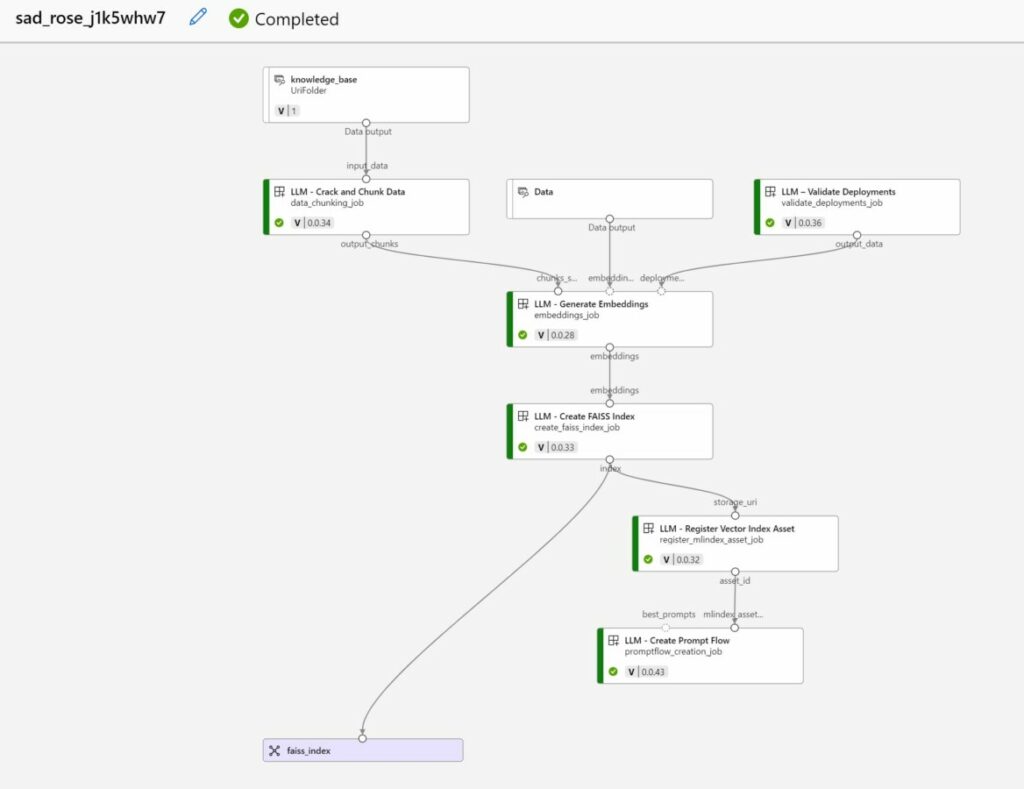
Once the “vector index” job is created, it will be run by the serverless compute. In the job details page, you can open the job to see which steps are executed during the job. You can clearly see that our folder in the blob store is chunked, embedded and indexed using FAISS.
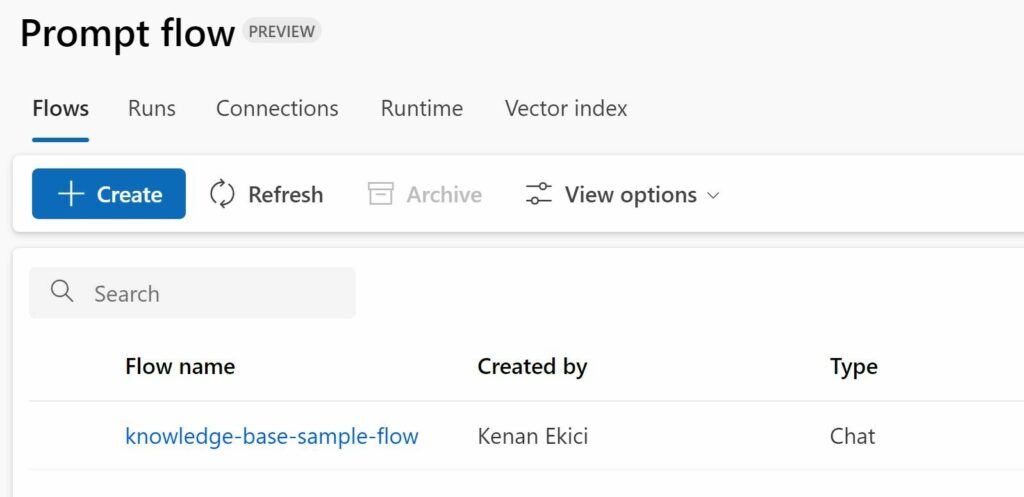
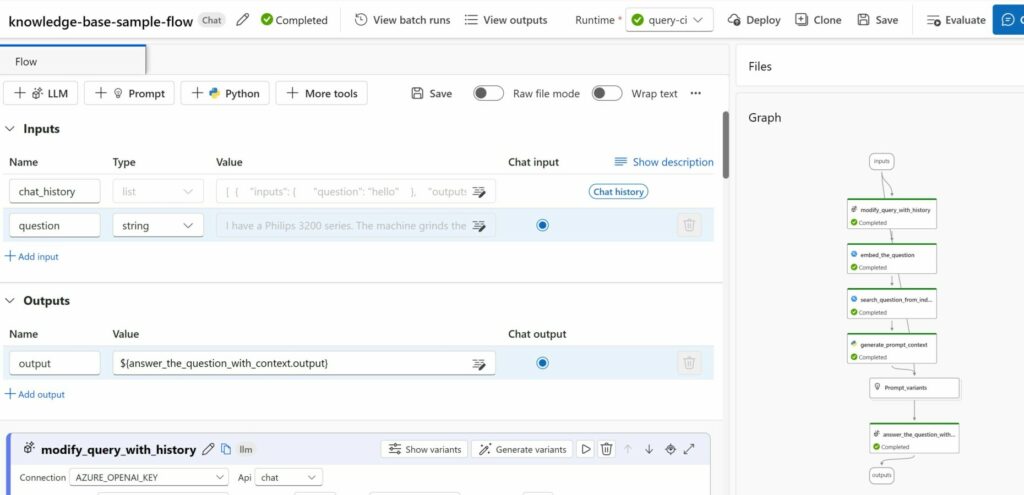
Create a chatbot (Prompt flow)
When the “vector index” job is finished, Azure Machine Learning will create a default “prompt flow” under “Flows”. This flow represents our chatbot and includes all the steps that are needed for our chatbot (ChatGPT3.5) to answer questions. You can inspect the individual steps by clicking on the flow. This will open an editor and a graph to visualize the flow.
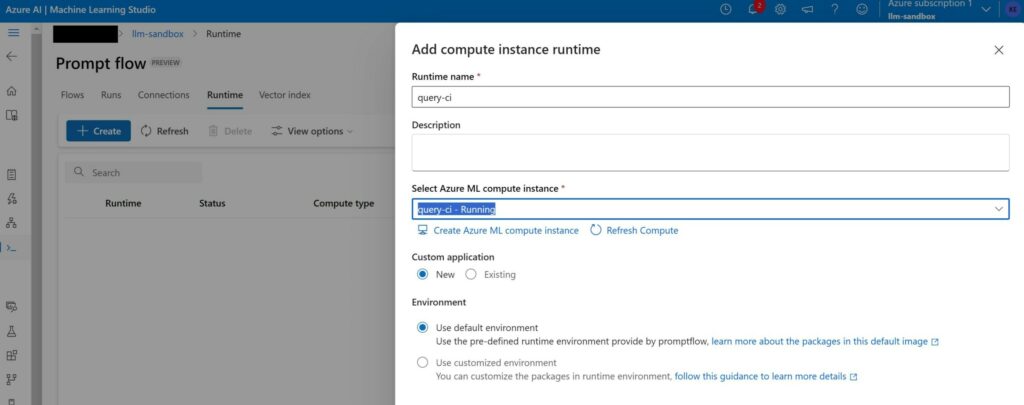
Create a compute instance
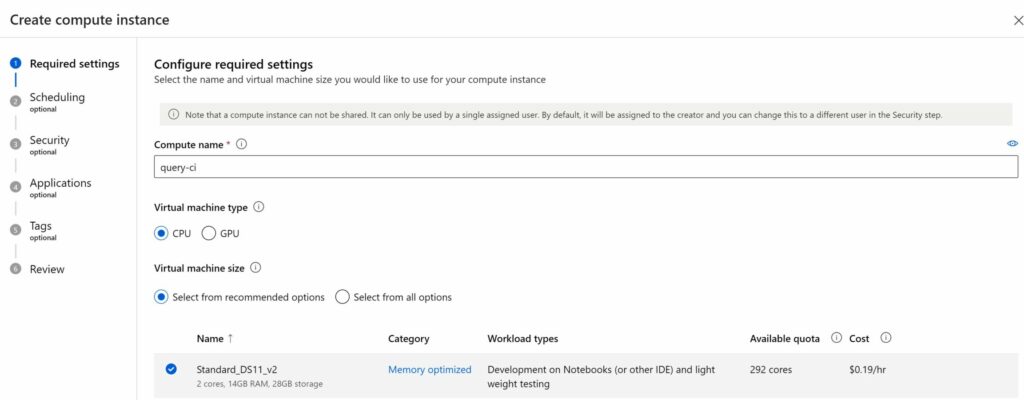
We can test this prompt flow under the condition that we have a compute instance to run it with. Go to the “runtime” tab under the Prompt flow page. Create a new compute instance by clicking “Create Azure ML compute instance”.
Pick an appropriate instance type. DS11_v2 is more than sufficient for this flow.
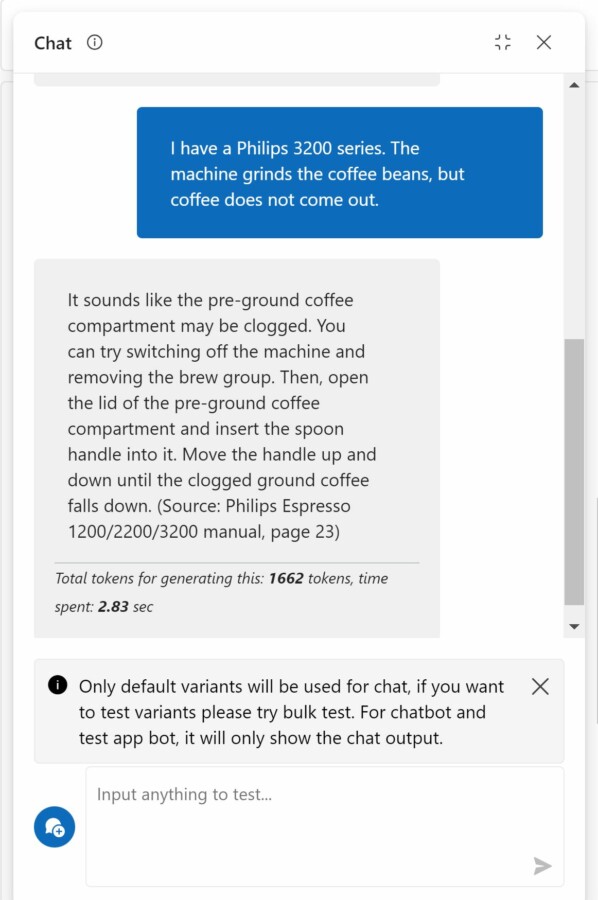
Once created and running, you can go back to the prompt flow and click on “Chat”. This will allow you to test the chatbot. Here’s a sample conversation below.
Deploy the chatbot as a managed online endpoint
If you’re satisfied with the result, you can deploy this chatbot as a managed online endpoint. This will create an API for your flow that you can integrate with other applications (such as automatically answering incoming emails or building a front-end application around the API).
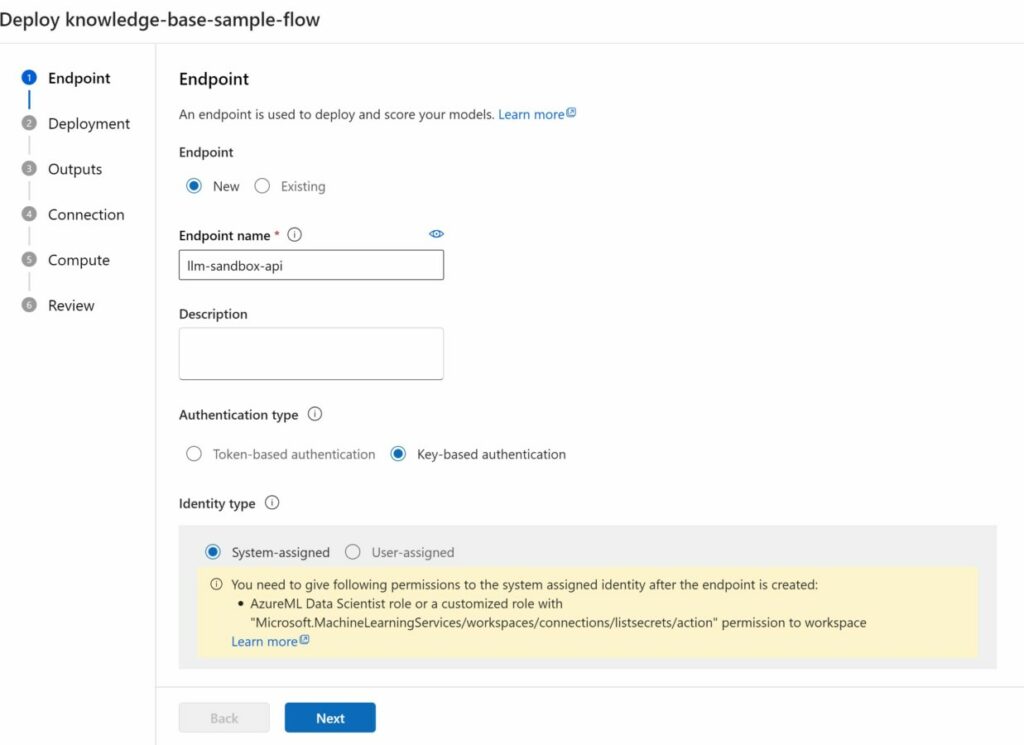
Click on “Deploy” in the prompt flow editor page. Pick a suitable name and select the compute instance that we created earlier. The creation and deployment of this endpoint can take a while (>5 minutes).
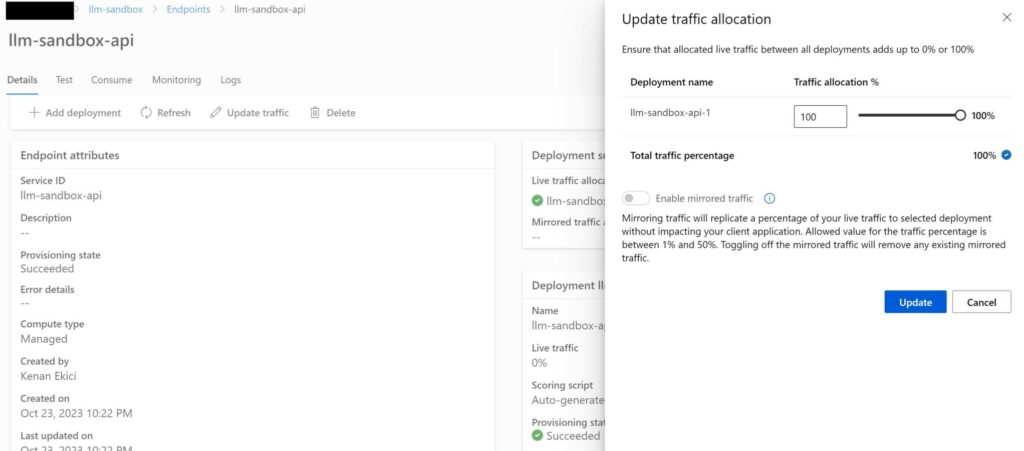
When deployed, set the traffic to 100% (if not already set automatically). This will allow the endpoint to accept incoming traffic.
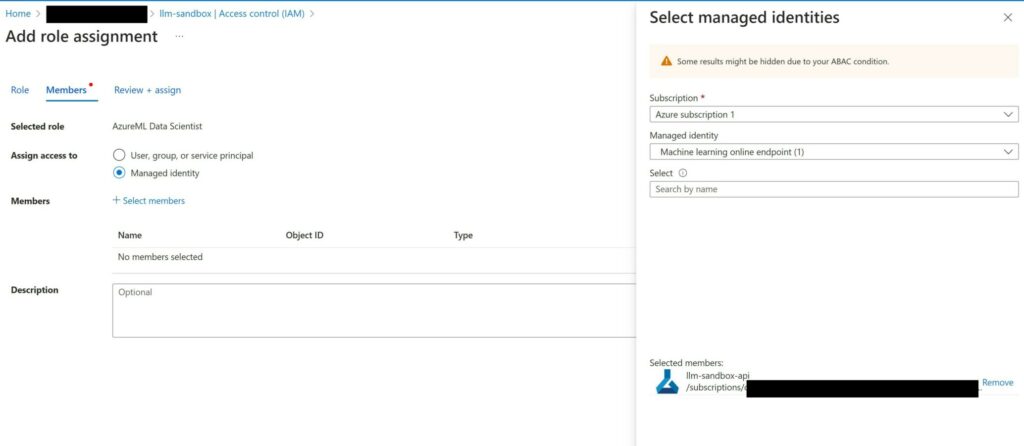
Before you can start testing this endpoint, you have to assign the “AzureML Data Scientist role”. To do this, go to the settings of managed online endpoint resource created under your resource group. Under “Access control (IAM)”, click on “Add” to add a role assignment.
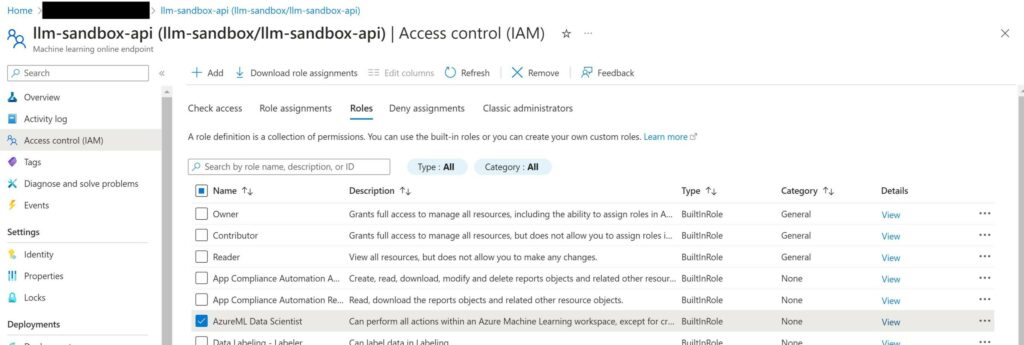
Pick a “Managed identity” and selected the “Machine learning online endpoint”. Ensure that you select the correct one in case you have others. Note that it can take up to 30 minutes for this to take effect!
Testing the chatbot
After the last changes in the previous step take effect, you can test the chatbot. For our toy problem, we have several options for integration of this chatbot. We can create a front-end application that end users (our customers) can use to ask questions and interact with the chatbot. Or we can setup a powerautomate flow to answers new emails automatically with the chatbot as they land to our business inbox.

Updating the vector index
It’s possible that we may need to update our vector store as new files are added to our blob store. This can be done simply by creating a new version of the data asset in Azure Machine Learning, and recreating the “vector index” job. Depending on the use-case however, this step might require automation such that we do not have to manually update the vector store. There’s currently no out-of-the-box support to automatically rerun this job on the latest version of the data asset.
Conclusion
In this blog, we have learned how to build a chatbot using Azure Machine Learning based on a small toy example. Although we used the standard prompt flow to deploy the chatbot, you can play around with this flow by adding default responses that will be triggered during edge cases, or by adding additional logic to the chat flow based on the requirements of your specific business/use-case.
It’s ridiculously easy to build an LLM-powered chatbot nowadays due to platforms that facilitate resources (storage, compute) and processes to operationalize chatbots. Unfortunately, there’s a hefty price you’re paying for convenience & resources that these platforms offer. If you want to trade convenience for a lower price, you’re absolutely right to opt for a custom setup that combines OpenAI (or other LLM providers), a vectorDB and an API (Flask, Django, …). You can achieve similar results. Of course, sans the benefits of Azure Machine Learning. Good luck!